Validation Rules Plugin. There is an eBook call Enterprise Application Patterns using Xamarin.Forms. “The eBook focuses on core patterns and architectural guidance for developing Xamarin.Forms enterprise apps that are easier to test, maintain, and evolve. Guidance is provided on how to implement the Model-View-ViewModel (MVVM) pattern, dependency injection, navigation, validation, and configuration management, while maintaining loose coupling. In addition, there’s also guidance on performing authentication and authorization with IdentityServer, accessing remote data from containerized microservices, and unit testing.” Says David Britch – The author.
He has a very good article talking about this topic here. If you want to know more about this topic I really recommend that you see his article and read the eBook.
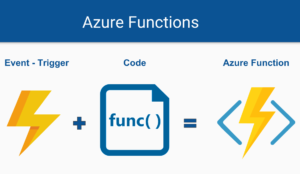
This blog post is focus on validation rules in Xamarin.Forms with the plugin Plugin.ValidationRules I released. So, you can see the example source code with the approach used in this post.
Topics:
Note: You can also see “Validating our Model” Documentation.
Validation Rules – Introduction
Any app that accepts input from users should ensure that the input is valid. Without validation, a user can supply data that causes the app to fail. Validation enforces business rules and prevents an attacker from injecting malicious data.
Improve the quality of your data using validation rules. Validation rules verify that the input an user enters in a record meets the standards you specify before the user can save the record. A validation rule can contain your own logic that evaluates the data in one or more fields and returns a value “True” or “False”. Validation rules also include an error message to display to the user when the rule returns a value “False” due to an invalid value.
You can specify the error message to display when an input fails validation and binding it to your UI to display it. Plugin.ValidationRules implement INotifyPropertyChanged. So, you don’t need to worry about the update your UI.
Cool, now that we have an understanding of validation rules we can start!
Set up
Assuming that we already have our project created and we already know what the validation rules are, then we can proceed to install the Plugin.ValidationRules for our application in 3 simple steps:
- In Solution Explorer, right click on the project and select Manage NuGet Package….
- In the Search bar, type Plugin.ValidationRules or ValidationRules.
- Select and install the ValidationRules into your project.
How to use it
Rules
First of all, you need to add the rules you want into your project. For that you must add a class that derives from ValidationRule<T> interface.
using Plugin.ValidationRules.Interfaces;

namespace ValidationRulesTest.Validations
{
    public class IsNotNullOrEmptyRule<T> : IValidationRule<T>
    {
        public string ValidationMessage { get; set; }

        public bool Check(T value)
        {
            if (value == null)
            {
                return false;
            }

            var str = value as string;
            return !string.IsNullOrWhiteSpace(str);
        }
    }
}
For this section I also create a visual studio extension that create an empty rule template for you. With this extension you don’t need to worry about copy and paste code. More info here.
Properties
Once you have your rules, you need to create the properties you want to validate. Those properties must be a ValidatableObject<T>. Your Properties don’t need to implement INotifyPropertyChanged interface. Plugin.ValidationRules has his own implementation called ExtendedPropertyChanged. So, the plugin do the job for you.
using Plugin.ValidationRules;

namespace ValidationRulesTest.ViewModels
{
    public class Example1ViewModel
    {
        public Example1ViewModel()
        {
            Name = new ValidatableObject<string>();
        }

        public ValidatableObject<string> Name { get; set; }
    }
}
Adding Validations
Before adding a validation rule to a property, be sure that you initialize the property. After that, add as many rules as you want to a property.
//Email validations
Email.Validations.Add(new IsNotNullOrEmptyRule<string>{ ValidationMessage = "A email is required." });
Email.Validations.Add(new EmailRule<string> { ValidationMessage = "Email is not valid." });
Validating properties
To validate a property, just call the myProperty.Validate() method. You can do it manually and use it in you ViewModel or code behind.
var isValidEmail = Email.Validate();
EXTRA: You can also add an EventToCommandBehavior and bind it to a command that call the validate method.
<Entry Text="{Binding Name.Value, Mode=TwoWay}" >
  <Entry.Behaviors>
    <behaviors:EventToCommandBehavior EventName="Unfocused" Command="{Binding ValidateUserNameCommand}" />
  </Entry.Behaviors>
</Entry>
If you don’t want to validate each property one by one; create a method for validating all properties at the same time for you.
public bool Validate()
{
    var isValidName = _name.Validate();
    var isValidLastname = _lastname.Validate();
    var isValidEmail = _email.Validate();

    // Your logic here
    return isValidName && isValidLastname && isValidEmail;
}
Or you can create a ValidationUnit property and passing all property, which you want to validate at the same time, by the constructor. After that, you can call yourUnit.Validate() method to validate yours properties.
_unit1 = new ValidationUnit(Name, LastName, Email);
var isValidUnit = _unit1.Validate();
Validation errors
If there is an error after the validation you can get it calling the list errors _myProperty.Errors in your code or calling the property _myProperty.Error to get the first or default error of the list.
var errors = Name.Errors;
var error = Name.Error;
Displaying results
To bind your properties and errors to your XAML file; do it in the following way.
<Entry Text="{Binding Name.Value, Mode=TwoWay}" />
<Label Text="{Binding Name.Error}" TextColor="Red" HorizontalTextAlignment="Center" />
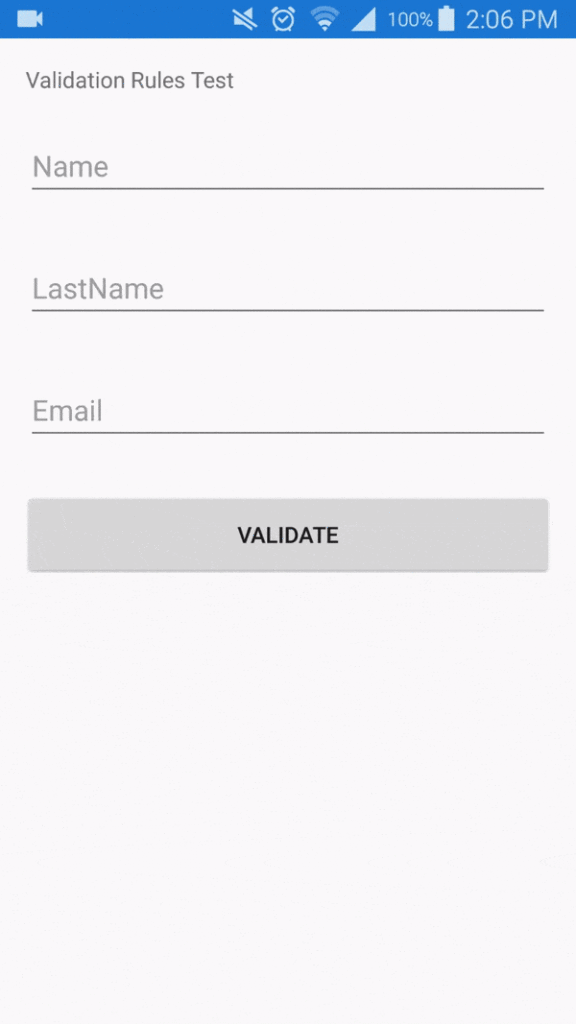
Final result
Conclusion
Plugin.ValidationRules is the easy way to add client-side validation of view model properties and notifies the user of any validation errors by showing them the control that contains the invalid data.
Resouces
- Available on NuGet: Plugin.ValidationRules
- Repository: Validation Rules Plugin for Xamarin and Windows
- Examples: Plugin.ValidationRules
- You can also see: “Validating our Model” Documentation.
- Extension for Visual Studio: Validation Rule Template
- How to use Validation Rule Template
[bucket id=”11123″ title=”Thanks for reading”]