If you don’t know how to use the Plugin.ValidationRules, I recommend you to see the main documentation. Well, once you know the plugin, we can continue to the next level.
It’s good to clarify that this publication focuses on validating our model in Xamarin with the Plugin Plugin.ValidationRules. In the same way, you can see the examples with the approach used in this post.
Introduction – ValidationRules
Validating user input data with Plugin.ValidationRules is relatively easy. However, in the main documentation the examples are presented with the direct properties. You and I know that if we work in a structured way the normal thing is to have a model to map the data we will use in our application.
To illustrate this proposed context, it will be shown how easy it is to validate our model with Plugin.ValidationRules. Great, let’s start!
Implementation
Model
The first thing would be to define your model and the properties that it is going to have. These properties must be a ValidatableObject<T>.
using Plugin.ValidationRules;

namespace ValidationRulesTest.Models
{
    public class User
    {
        public User()
        {
            LastName = new ValidatableObject<string>();
            Name = new ValidatableObject<string>();
            Email = new ValidatableObject<string>();
        }

        public ValidatableObject<string> LastName { get; set; }
        public ValidatableObject<string> Name { get; set; }
        public ValidatableObject<string> Email { get; set; }
    }
}
Something evident that you can notice here, is that we are initializing our properties directly in the constructor of our model. Although, you can leave it like this or make your implementation in your ViewModel.
Note: Your properties don’t need to implement the interface INotifyPropertyChanged for updating your UI. Plugin.ValidationRules has its own implementation called ExtendedPropertyChanged. This means that the plugin does all the job for you.
Adding Validations
At this point you can add the validations directly in your model to avoid duplicate code. Or you can do it in your ViewModel as shown below.
using Plugin.ValidationRules;
using ValidationRulesTest.Validations;
using ValidationRulesTest.Models;

namespace ValidationRulesTest.ViewModels
{
    public class Example2ViewModel
    {
        public Example2ViewModel()
        {
            User = new User();
            AddValidations();
        }

        public User User { get; set; }

        private void AddValidations()
        {
            // Name validations
            User.Name.Validations.Add(new IsNotNullOrEmptyRule<string> { ValidationMessage = "A name is required." });

            //Lastname validations
            User.LastName.Validations.Add(new IsNotNullOrEmptyRule<string> { ValidationMessage = "A lastname is required." });

            //Email validations
            User.Email.Validations.Add(new IsNotNullOrEmptyRule<string>{ ValidationMessage = "A email is required." });
            User.Email.Validations.Add(new EmailRule<string> { ValidationMessage = "Email is not valid." });
        }

    }
}
Validating properties
To validate a property, just call the myProperty.Validate() method.
var isValidEmail = User.Email.Validate();
EXTRA: You can also add an EventToCommandBehavior and bind it to a command that call the validate method.
<Entry Text="{Binding User.Name.Value, Mode=TwoWay}" >
  <Entry.Behaviors>
    <behaviors:EventToCommandBehavior EventName="Unfocused" Command="{Binding ValidateUserNameCommand}" />
  </Entry.Behaviors>
</Entry>
Displaying results
To bind your properties and errors to your XAML file; do it in the following way.
<Entry Text="{Binding User.Name.Value, Mode=TwoWay}" />
<Label Text="{Binding User.Name.Error}" TextColor="Red" HorizontalTextAlignment="Center" />
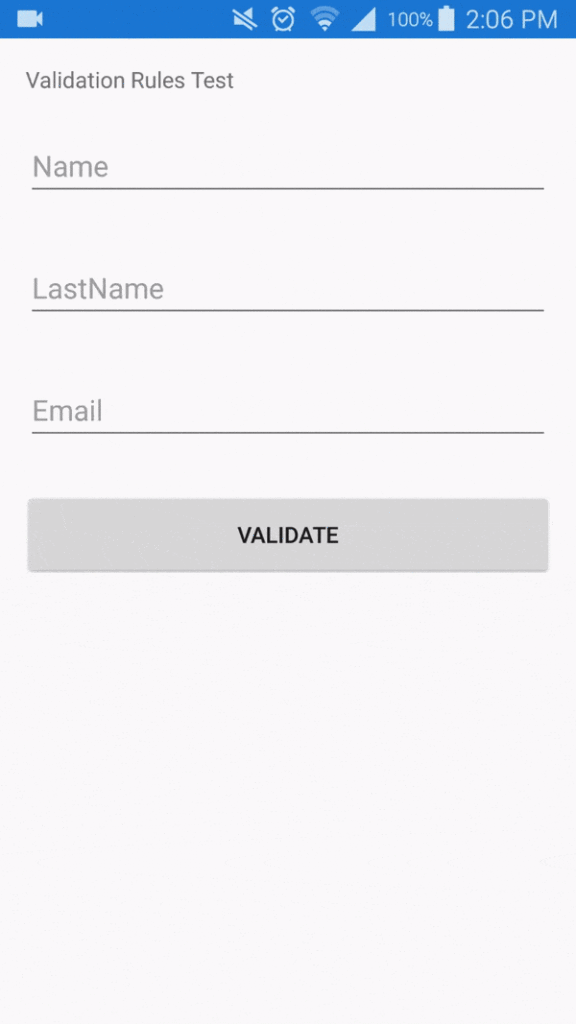
Final result

Conclusion
Plugin.ValidationRules is the easy way to add client-side validation of view model properties. Notifies the user of any validation errors by showing them the control that contains the invalid data.
Recursos
- Official documentation: Validation Rules for Xamarin and Windows
- Available on NuGet: Plugin.
- Repository: Validation Rules Plugin for Xamarin and Windows
- Examples: Repository
- Extension for Visual Studio: Validation Rule Template
- How to use Validation Rule Template
- More resources: Xamarin Universal Library
[bucket id=”11123″ title=”Thanks for reading”]


